
DIY vs. Professional Radon Testing: Which Is Right for You?
When I first started working with homeowners, many of them told me they had never even heard of radon until someone mentioned radon testing during a home inspection or while reading about indoor air quality. That is one of the scariest parts about radon because it does not give you any warning signs. You can live with elevated radon levels for years without symptoms, only to discover too late that it has been affecting your health.
Radon is odorless, colorless, and tasteless. Yet, it is the second leading cause of lung cancer in the United States, only behind smoking. What makes it so dangerous is that it seeps quietly into your home through cracks in the foundation, gaps in pipes, sump pumps, and sometimes even through well water. That is why radon testing is not optional. It is essential.
The big question I hear all the time is: Should you do the radon testing yourself, or should you hire a professional like me? Let me walk you through both options so you can make the right call for your home and family.
- Know what you’re breathing in: the real story on radon
- What it’s really like to test your home yourself
- What I experienced when I hired a pro
- How I decide which testing method to use (and when)
- What do you do after you’ve tested?
No matter which option you are leaning toward, keep reading because understanding the differences could save you time, money, and most importantly, protect your family’s health.
Know What You’re Breathing In: The Real Story on Radon
Radon is sneaky. I do not say that lightly. It is a radioactive gas that comes from the natural breakdown of uranium in soil and rock. You cannot see it, you cannot smell it, and you cannot taste it. But it can enter your home through cracks in the foundation, gaps around pipes, sump pumps, or even well water.
Here is what stands out to me and why I take this so seriously:
- EPA estimates show that radon is a leading cause of lung cancer in both smokers and non-smokers in the US.
- The EPA recommends every home be tested, even if you do not live in a so-called high-risk area.
- The only way to know if you are at risk is to actually test. That is it.
Too many homeowners assume that because their house is new or built with modern materials, they are safe. I have tested brand-new homes and found dangerously high radon levels. Radon does not discriminate, and it does not matter how new or old your house is.
What It’s Really Like to Test Your Home Yourself
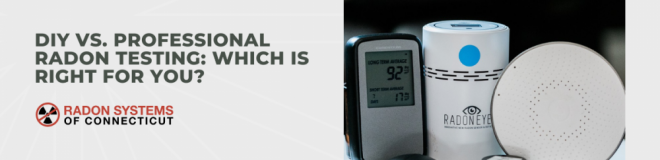
Over the years I have worked with many clients who started with DIY radon test kits before reaching out to me. I have also used them myself for demonstration purposes. There are a couple of main types:
- Charcoal canisters: You place them in the lowest livable level of your home, leave them undisturbed for two to seven days, then mail them to a lab for analysis.
- Digital detectors: These cost more upfront but give you ongoing real-time readings.
Here is what I have learned about DIY kits:
Advantages
- They are the more affordable options, usually below $100.
- Convenient to purchase online or at a hardware store.
- A reasonable first step if you want a snapshot of your radon levels.
Limitations
- Accuracy depends heavily on correct use. Even a small mistake like placing the device near a drafty window or running your HVAC system can produce false results.
- Results take time if you are mailing samples to a lab.
- Typically only provide short-term data, so you may miss seasonal variations.
I see DIY testing as a good starting point, but it rarely gives homeowners the full picture. Many of my clients who started with DIY kits came to me because their results left them with more questions than answers.
What I Experienced When I Hired a Pro
When I conduct professional radon testing, I use advanced, calibrated monitors that track data every hour for 48 hours or more. These devices are far more accurate than anything a homeowner can buy at a store.
Here is what sets professional testing apart:
- Higher accuracy: Continuous monitors measure radon fluctuations around the clock, giving a true picture of exposure.
- Clear results: I deliver a detailed report that explains the numbers and what they mean for your family.
- Guidance: Homeowners do not have to interpret results on their own. I explain whether mitigation is needed and what the next steps are.
Of course, there are trade-offs:
- Professional testing costs more, usually around $150.
- You need to schedule an appointment for placement and pickup.
- It requires allowing the equipment to remain undisturbed for the full test period.
Still, the peace of mind and accuracy make professional testing the best choice for situations where certainty is critical, such as during a home sale, after renovations, or when you suspect high radon levels.
How I Decide Which Method to Use (and When)
After years of working in this field, here is the approach I recommend to homeowners:
- Routine check-up: A DIY kit is acceptable if you simply want a quick update between professional tests.
- Buying or selling a home: Always use professional testing. Real estate transactions require certified, documented results.
- Living in a radon-prone area: Professional testing every few years is smart, even if your last test was low.
- At-risk family members: If you have young children, elderly parents, or anyone with respiratory issues in the home, professional testing is the safest choice.
I often remind families that radon is not a one-time problem you solve and forget. It requires regular monitoring because levels can change over time with weather patterns, soil shifts, and home renovations.
What Do You Do After You’ve Tested?
Knowing what your results mean is just as important as running the test. Here is how I guide homeowners:
- Below 2.0 pCi/L: You are in good shape. Retest every two years, or sooner if you renovate.
- Between 2.0 and 4.0 pCi/L: Treat this as a caution zone. Retest in a different season or have a professional confirm results.
- Above 4.0 pCi/L: This is the EPA action level. Mitigation is strongly recommended.
I have installed mitigation systems for families whose radon levels were dangerously high. In every case, their levels dropped to safe ranges within days. Most systems work quietly in the background, require very little maintenance, and provide peace of mind that your family is protected.
Conclusion
Choosing between DIY and professional radon testing comes down to how much certainty you want and how much risk you are willing to accept. DIY testing can be a useful first step, but professional testing delivers the accuracy and guidance most families need to make informed decisions.
Radon is not something to put off or ignore. It is invisible, silent, and dangerous. But with the right testing and, if necessary, a mitigation system, it is a problem that can be controlled. My advice as a radon professional is simple: test your home, understand your results, and take action if needed. Knowing your radon levels is not just knowledge. It is protection for the people you love.